• Register
    • Login
    • Search
    • Recent
    • Wiki
    • Github
    • 百度网盘
    • Onedrive
    • Official
    • Shop
    1. Home
    2. edwardzhou
    E
    • Profile
    • Following 0
    • Followers 0
    • Topics 4
    • Posts 25
    • Best 2
    • Controversial 0
    • Groups 0

    edwardzhou

    @edwardzhou

    2
    Reputation
    6
    Profile views
    25
    Posts
    0
    Followers
    0
    Following
    Joined Last Online

    edwardzhou Unfollow Follow

    Best posts made by edwardzhou

    • RE: Cool pi 4B & CM5 探索快速安装系统新方法

      最近一直在用这个方法,非常太好用太方便了。

      我对上面的备份安装放在同一个U盘实现的方法,做了一些改进,通过启动菜单选择 备份 还是 安装, 比每次去改 initrd.img 要方便很多。

      步骤1. 编辑 /extlinux/extlinux.conf 如下

      menu title Select the boot mode
      TIMEOUT 60
      default Linux coolpi backup
      
      label Linux coolpi backup
      	kernel /Image
      	initrd /initrd-backup.img
      	fdt    /rk3588s-cp4.dtb
      	append root=LABEL=writable rw rootfstype=ext4 console=ttyS0,115200n81 quiet splash plymouth.ignore-serial-consoles vt.global_cursor_default=1 irqchip.gicv3_pseudo_nmi=0 net.ifnames=0
      
      label Linux coolpi install
      	kernel /Image
      	initrd /initrd-install.img
      	fdt    /rk3588s-cp4.dtb
      	append root=LABEL=writable rw rootfstype=ext4 console=ttyS0,115200n81 quiet splash plymouth.ignore-serial-consoles vt.global_cursor_default=1 irqchip.gicv3_pseudo_nmi=0 net.ifnames=0


      步骤2, 把 install 中的 initrd.img 复制过来,并改名为 initrd-install.img

      步骤3, 把 backup 中的 initrd.img 复制过来,并改名为 initrd-backup.img

      U盘查到板子上,上电启动。
      你局可以看到菜单

      Capacity: 30436.5 MB = 29.7 GB (62333952 x 512)
      ... is now current device
      Scanning usb 0:1...
      Found /extlinux/extlinux.conf
      Retrieving file: /extlinux/extlinux.conf
      reading /extlinux/extlinux.conf
      629 bytes read in 39 ms (15.6 KiB/s)
      Select the boot mode
      1:	Linux coolpi backup
      2:	Linux coolpi install
      Enter choice:
      

      输入1 或 2 回车即可,默认是1, 60秒无输入,则自动启动backup

      posted in Maker
      E
      edwardzhou
    • Cool Pi4 Ubuntu 22.04 上 ssh remote 方式访问USB摄像头的问题与解决

      环境: Ubuntu 22.04 0303纯净版

      接上 usb camera 开机,没有登陆桌面

      ssh 登录 coolpi4 (ip: 192.168.5.63)

      ssh 192.168.5.63
      
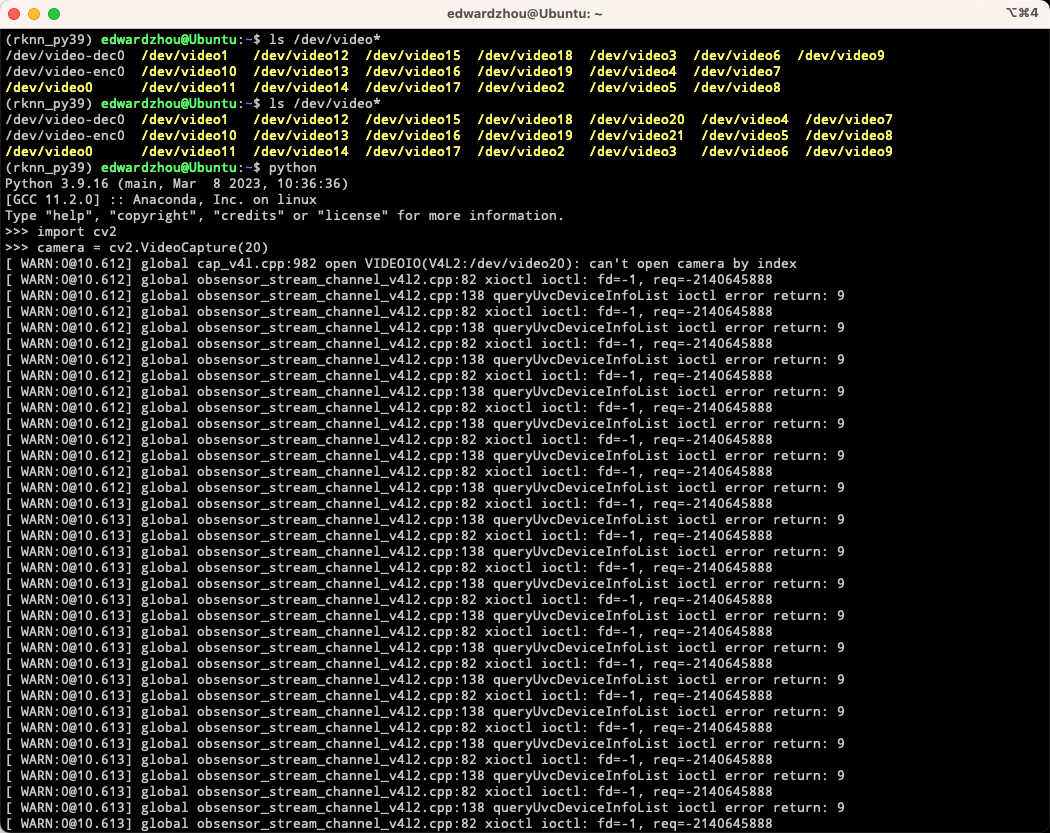
      python
      
      import cv2
      camera = cv2.VideoCapture(20)


      得到如下错误
      c5435a3e-0288-4181-b139-88025e6061f6-image.png

      无法打开usb 摄像头。

      接上显示器,鼠标键盘,登录桌面后,在桌面的terminal中,能够正常打开摄像头获取图像。

      此时,到前面的ssh remote 里,发现也能打开摄像头获取头像了。

      好玩的事情出现,当我登出桌面(log out)后, ssh remote 又无法打开摄像头。

      后面猜测可能是权限的问题,便问了chatgpt, 并进行验证

      sudo python
      import cv2
      camera = cv2.VideoCapture(20)
      

      发现在不没有登录桌面的情况下,是能成功打开摄像头。

      还可以加入到video用户组,就不需要提权了.

      sudo usermod -aG video edwardzhou
      # 重新登录
      
      python
      import cv2
      camera = cv2.VideoCapture(20)   # 成功
      

      总结:
      确保当前用户在 video 组里面。

      posted in Ubuntu
      E
      edwardzhou

    Latest posts made by edwardzhou

    • RE: CoolPi 4b Ubuntu gst拉取usb摄像头不稳定,经常断开

      @george
      dmsg.log

      posted in Pi 4B
      E
      edwardzhou
    • CoolPi 4b Ubuntu gst拉取usb摄像头不稳定,经常断开

      uname -a
      Linux Ubuntu 5.10.110 #5 SMP Thu Mar 2 17:39:26 CST 2023 aarch64 aarch64 aarch64 GNU/Linux

      系统是论坛上下载的Ubuntu

      cat /etc/lsb-release
      DISTRIB_ID=Ubuntu
      DISTRIB_RELEASE=22.04
      DISTRIB_CODENAME=jammy
      DISTRIB_DESCRIPTION="Ubuntu 22.04.3 LTS"
      

      USB摄像头:

      (rknn_py39) edwardzhou@Ubuntu:~/opencv_work/build$ v4l2-ctl -d /dev/video20 --all
      Driver Info:
      	Driver name      : uvcvideo
      	Card type        : USB PHY 2.0: USB CAMERA
      	Bus info         : usb-fc800000.usb-1.3
      	Driver version   : 5.10.110
      	Capabilities     : 0x84a00001
      		Video Capture
      		Metadata Capture
      		Streaming
      		Extended Pix Format
      		Device Capabilities
      	Device Caps      : 0x04200001
      		Video Capture
      		Streaming
      		Extended Pix Format
      Media Driver Info:
      	Driver name      : uvcvideo
      	Model            : USB PHY 2.0: USB CAMERA
      	Serial           :
      	Bus info         : usb-fc800000.usb-1.3
      	Media version    : 5.10.110
      	Hardware revision: 0x00000100 (256)
      	Driver version   : 5.10.110
      Interface Info:
      	ID               : 0x03000002
      	Type             : V4L Video
      Entity Info:
      	ID               : 0x00000001 (1)
      	Name             : USB PHY 2.0: USB CAMERA
      	Function         : V4L2 I/O
      	Flags            : default
      	Pad 0x01000007   : 0: Sink
      	  Link 0x02000013: from remote pad 0x100000a of entity 'Extension 4' (Video Pixel Formatter): Data, Enabled, Immutable
      Priority: 2
      Video input : 0 (Camera 1: ok)
      Format Video Capture:
      	Width/Height      : 640/480
      	Pixel Format      : 'MJPG' (Motion-JPEG)
      	Field             : None
      	Bytes per Line    : 0
      	Size Image        : 4177920
      	Colorspace        : sRGB
      	Transfer Function : Rec. 709
      	YCbCr/HSV Encoding: ITU-R 601
      	Quantization      : Default (maps to Full Range)
      	Flags             :
      Crop Capability Video Capture:
      	Bounds      : Left 0, Top 0, Width 640, Height 480
      	Default     : Left 0, Top 0, Width 640, Height 480
      	Pixel Aspect: 1/1
      Selection Video Capture: crop_default, Left 0, Top 0, Width 640, Height 480, Flags:
      Selection Video Capture: crop_bounds, Left 0, Top 0, Width 640, Height 480, Flags:
      Streaming Parameters Video Capture:
      	Capabilities     : timeperframe
      	Frames per second: 30.000 (30/1)
      	Read buffers     : 0
            white_balance_temperature 0x0098091a (int)    : min=0 max=255 step=1 default=128 value=128
      

      发现有两个问题:

      1. usb摄像头如果接 USB3.0的那两个蓝色接口,无法工作,gst打不开。接 USB2.0的插口,才能工作。

      2. 用gst-launch-1.0 测试
        1) 有时会直接失败, 再次又能成功
        失败日志:

      (rknn_py39) edwardzhou@Ubuntu:~/opencv_work/build$ gst-launch-1.0 v4l2src device=/dev/video20 ! image/jpeg,width=640,height=480 ! jpegparse !  mppjpegdec ! videoconvert ! appsink
      Setting pipeline to PAUSED ...
      Pipeline is live and does not need PREROLL ...
      Pipeline is PREROLLED ...
      Setting pipeline to PLAYING ...
      New clock: GstSystemClock
      libv4l2: error turning on stream: Input/output error
      ERROR: from element /GstPipeline:pipeline0/GstV4l2Src:v4l2src0: Failed to allocate required memory.
      Additional debug info:
      ../sys/v4l2/gstv4l2src.c(800): gst_v4l2src_decide_allocation (): /GstPipeline:pipeline0/GstV4l2Src:v4l2src0:
      Buffer pool activation failed
      ERROR: from element /GstPipeline:pipeline0/GstV4l2Src:v4l2src0: Internal data stream error.
      Additional debug info:
      ../libs/gst/base/gstbasesrc.c(3127): gst_base_src_loop (): /GstPipeline:pipeline0/GstV4l2Src:v4l2src0:
      streaming stopped, reason not-negotiated (-4)
      Execution ended after 0:00:00.067890509
      Setting pipeline to NULL ...
      Freeing pipeline ...
      

      2) 能成功拉取,过十几秒又会自动中断
      开始成功的输出

      (rknn_py39) edwardzhou@Ubuntu:~/opencv_work/build$ gst-launch-1.0 v4l2src device=/dev/video20 ! image/jpeg,width=640,height=480 ! jpegparse !  mppjpegdec ! videoconvert ! appsink
      Setting pipeline to PAUSED ...
      Pipeline is live and does not need PREROLL ...
      Pipeline is PREROLLED ...
      Setting pipeline to PLAYING ...
      New clock: GstSystemClock
      Redistribute latency...
      0:00:07.9 / 99:99:99.
      

      拉取过十几秒后失败 自动断开

      rknn_py39) edwardzhou@Ubuntu:~/opencv_work/build$ gst-launch-1.0 v4l2src device=/dev/video20 ! image/jpeg,width=640,height=480 ! jpegparse !  mppjpegdec ! videoconvert ! appsink
      Setting pipeline to PAUSED ...
      Pipeline is live and does not need PREROLL ...
      Pipeline is PREROLLED ...
      Setting pipeline to PLAYING ...
      New clock: GstSystemClock
      Redistribute latency...
      ERROR: from element /GstPipeline:pipeline0/GstV4l2Src:v4l2src0: Internal data stream error.
      Additional debug info:
      ../libs/gst/base/gstbasesrc.c(3127): gst_base_src_loop (): /GstPipeline:pipeline0/GstV4l2Src:v4l2src0:
      streaming stopped, reason error (-5)
      Execution ended after 0:00:13.670819439
      Setting pipeline to NULL ...
      Freeing pipeline ...
      
      posted in Pi 4B
      E
      edwardzhou
    • RE: Stay tuned for Linux 6.7...............................soon

      👍 👍 👍 👍

      BuildRoot 也要跟上呀

      posted in Pi CM5
      E
      edwardzhou
    • Cool Pi4 Ubuntu 22.04 上 ssh remote 方式访问USB摄像头的问题与解决

      环境: Ubuntu 22.04 0303纯净版

      接上 usb camera 开机,没有登陆桌面

      ssh 登录 coolpi4 (ip: 192.168.5.63)

      ssh 192.168.5.63
      
      python
      
      import cv2
      camera = cv2.VideoCapture(20)


      得到如下错误
      c5435a3e-0288-4181-b139-88025e6061f6-image.png

      无法打开usb 摄像头。

      接上显示器,鼠标键盘,登录桌面后,在桌面的terminal中,能够正常打开摄像头获取图像。

      此时,到前面的ssh remote 里,发现也能打开摄像头获取头像了。

      好玩的事情出现,当我登出桌面(log out)后, ssh remote 又无法打开摄像头。

      后面猜测可能是权限的问题,便问了chatgpt, 并进行验证

      sudo python
      import cv2
      camera = cv2.VideoCapture(20)
      

      发现在不没有登录桌面的情况下,是能成功打开摄像头。

      还可以加入到video用户组,就不需要提权了.

      sudo usermod -aG video edwardzhou
      # 重新登录
      
      python
      import cv2
      camera = cv2.VideoCapture(20)   # 成功
      

      总结:
      确保当前用户在 video 组里面。

      posted in Ubuntu
      E
      edwardzhou
    • RE: Coolpi 4b firmware with buildroot

      @大法师 Nice Job. 烧录启动成功. 能自动启动进入桌面,串口也能操作 👍

      posted in Buildroot
      E
      edwardzhou
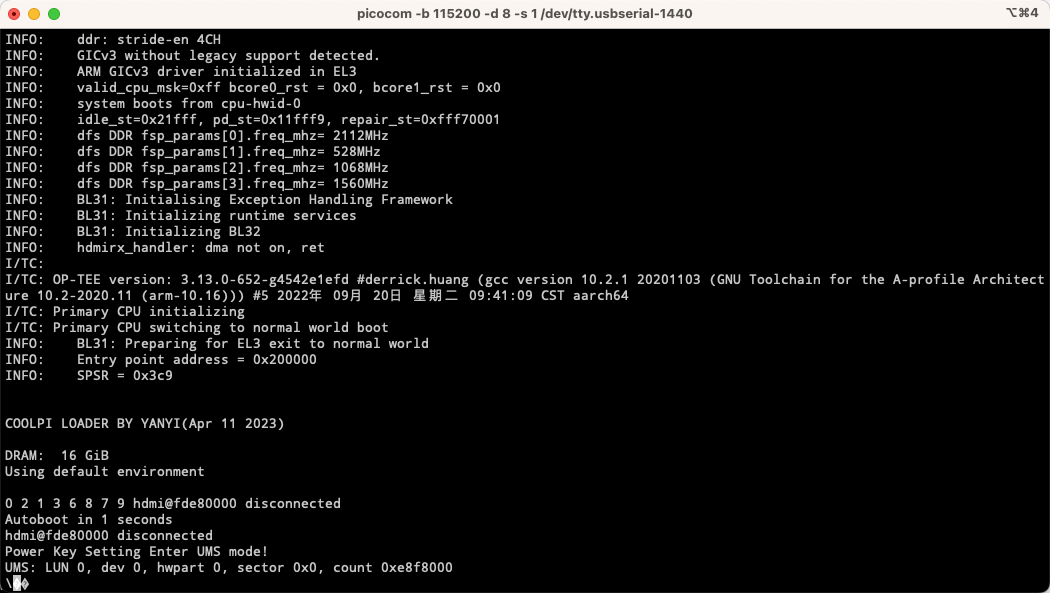
    • RE: Coolpi uses UMS to update the system

      @george 是不是只支持windows? 我在Mac上没有发现这个设备

      posted in Pi 4B
      E
      edwardzhou
    • RE: Low power mode 的一些方法請益

      USB摄像头接上,就出现一大堆 /dev/videoXX 设备,如何判别哪一个是真实可用的?

      posted in Ubuntu
      E
      edwardzhou
    • RE: Coolpi uses UMS to update the system

      这应该是刷成功了吧?

      a5968903-b27a-41cf-b906-fe23d5109041-image.png

      双头USB-A线没带,还没有办法实测

      posted in Pi 4B
      E
      edwardzhou
    • RE: Coolpi support 32GB of RAM

      @george 👍

      posted in Pi 4B
      E
      edwardzhou
    • RE: Coolpi 4b firmware with buildroot

      仓库更新的版本编译起来很丝滑

      make coolpi4_defconfig
      make -j12

      把 rootfs.tar.gz 拷贝到 U盘的install 目录下,插上即可完成系统刷新。

      期待继续完善支持:

      1. 构建可以直接启动引导的可烧卡镜像,就不用通过U盘install工具。

      2. 启用蓝牙驱动模块

      3. 启用WiFi驱动模块

      4. rknpu toolket 1.4

      5. BuildRoot upgrade 到 2022.11 或 最新 2023.02
        更好的做法,把 coolpi4 的相关部分抽离出来成为一个patch
        这就容易进行 buildroot的升级,甚至用户可以自己去尝试升级buildroot

      posted in Buildroot
      E
      edwardzhou